Step-by-step Guide to Setup Google Analytics
Take a look at our simple guide on how to setup Google Analytics.
Google Analytics is one of the most insightful web analytics applications available for businesses. And what makes Google Analytics even more appealing, it it’s completely free to setup.
Step 1 – Make a Google Analytics Account
Click here to setup your Google Analytics account.
- – To create an account, simply click Sign up
- – If you already have an account, just enter your email address and password
Step 2 – Your Account and Property
Once you’ve got a Google account, just go to the Google Analytics Page and Sign Up.
As you can see from the image below, there’s three steps to complete until you’re up and running.
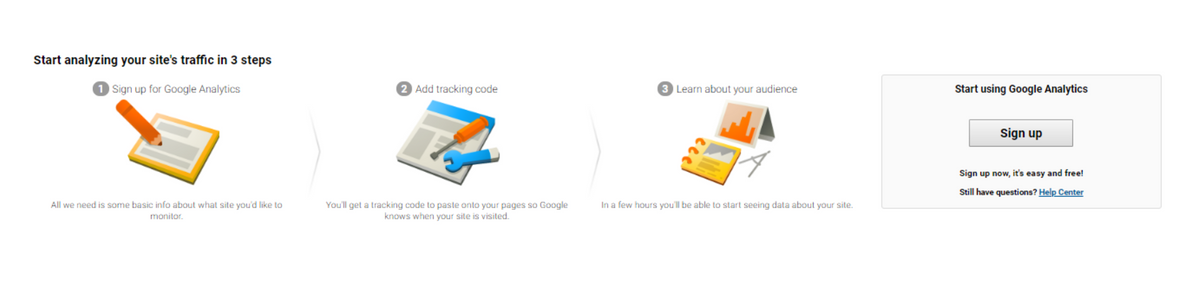
Once you’ve clicked ‘Sign Up’ you will then need to setup your new account. The steps are self-explanatory. Once you’ve completed all the steps, select, “Get Tracking ID” at the bottom of the page.
Step 3 – Getting Your Tracking Code
First, you’ll get a popup for Google Analytics Terms and Conditions which you need to agree to access your Google Analytics code.
The code is just a snippet of JavaScript that will collect and send data to Google Analytics from your website.
Step 4 – Installing Your Tracking Code
 This is where things can get a bit confusing if you’re unfamiliar with coding …
Installing Google Analytics varies based on the CMS (content management system), website builder or e-commerce software, your theme and plugins you use.
There isn’t a universal way to install Google Analytics on to your site, but there will be plenty of easy to find guides to install your tracking code.
Simple use a search engine (like Google) and conduct a search for your platform and how to install Google Analytics.
If you’re looking for some guidance, you can always contact us for support.
How to Install Google Analytics in WordPress
To begin, head over to your WordPress Dashboard. There’s a few ways you can install setup Google Analytics on to your WordPress site, it’s up to you which way you choose. Here’s three examples;
1. Plugin by MonsterInsights

Download ‘Google Analytics for WordPress by MonsterInsights’ and activate it.
Then you need to configure your plugin, simply go to ‘Google Analytics Settings’ at the top of the page.
Authenticate with your Google account and Google will walk you through the simply process.
2. Plugin by WPBeginner
Download, “Insert Headers and Footers” and activate it.
On your dashboard hover over “settings” and select “Insert Headers and Footers” from the dropdown menu.
Head back over to Google Analytics and copy the script under ‘Website Tracking.
Return to your WordPress Dashboard and copy the script into the box labelled, “Scripts in Header” and save changes.
3. Coding
If you consider your self WordPress savvy you can try this option, but we recommend sticking to either of the two above options if you’re a beginner.
Copy you’re the script under “Website Tracking” and add directly to your header.php file.
Contact Different Gravy Digital for Google Analytics Support
Get in touch for a free, no obligation consultation for more information!
Why not check out our Digital Marketing Terms Glossary?
E: contact@differentgravydigital.co.uk
Tel: 0161 706 0004
About the author:
Marie Harwood is a Digital Marketing Assistant at Different Gravy Digital, Hale, Cheshire.
Different Gravy Digital are a full service Digital Marketing Agency operating in the Hospitality & Leisure, Financial Services, Legal & Property sectors. Products and services range from; 3D & 360° Tours, Website Design & Build, Social Media, Video Production, Search Engine Optimisation (SEO), Content Creation, Email Marketing, Online Feedback / Review Systems and Paid Advertising (Google, Bing and Social Media).
Contact Details:
marie@differentgravydigital.co.uk
0161 706 0004
120a Ashley Road, Hale, Altrincham, Cheshire, WA14 2UN